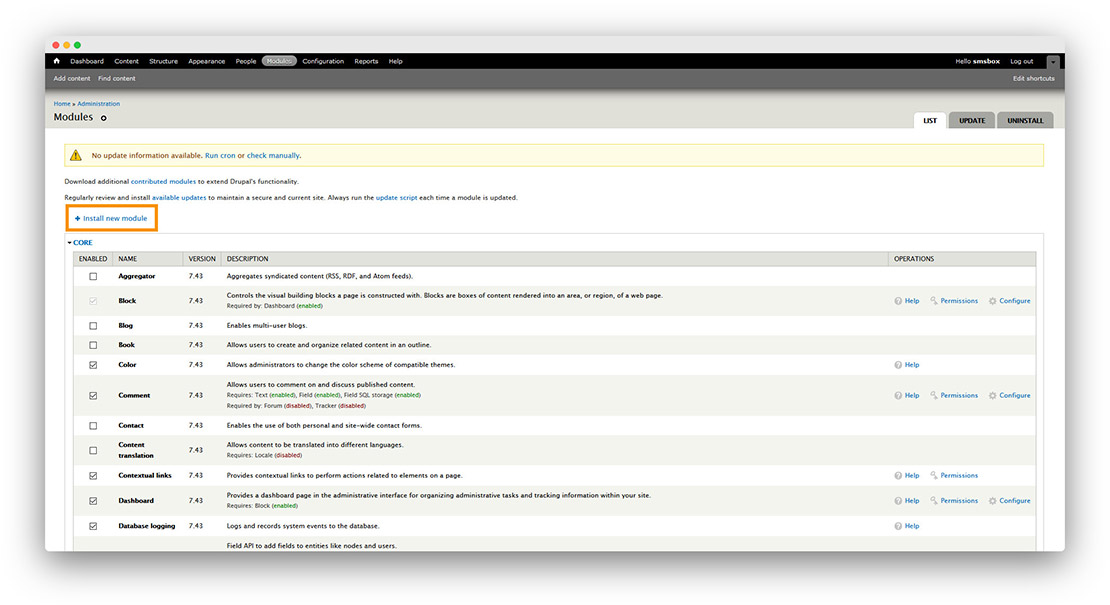
Step 1 Go to Manage → Extend, then click Install new module.
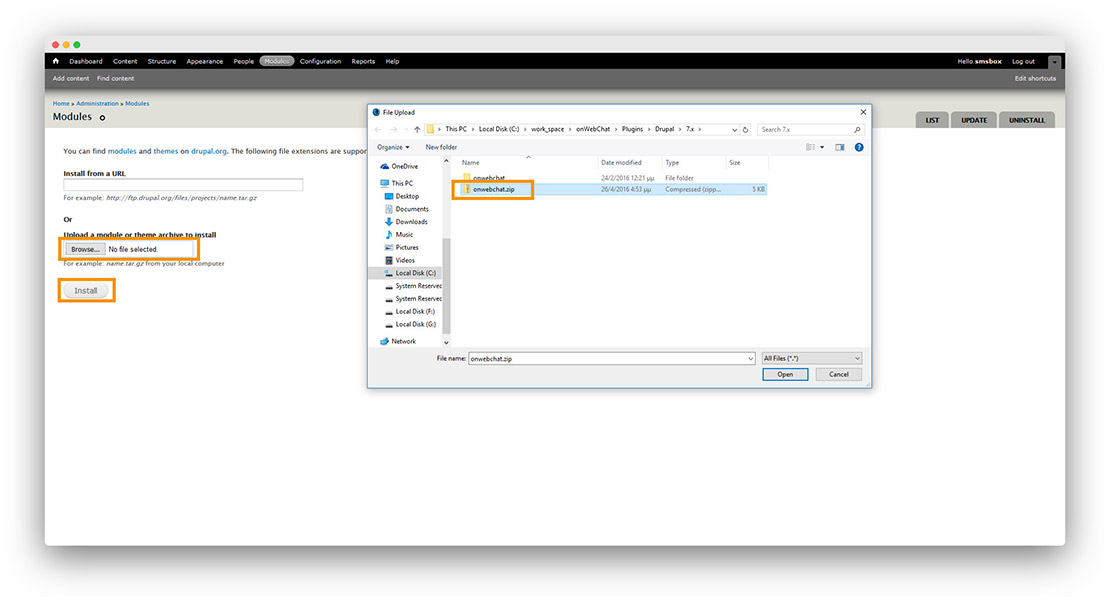
Step 2 Choose the downloaded module file, upload it, then click Install.
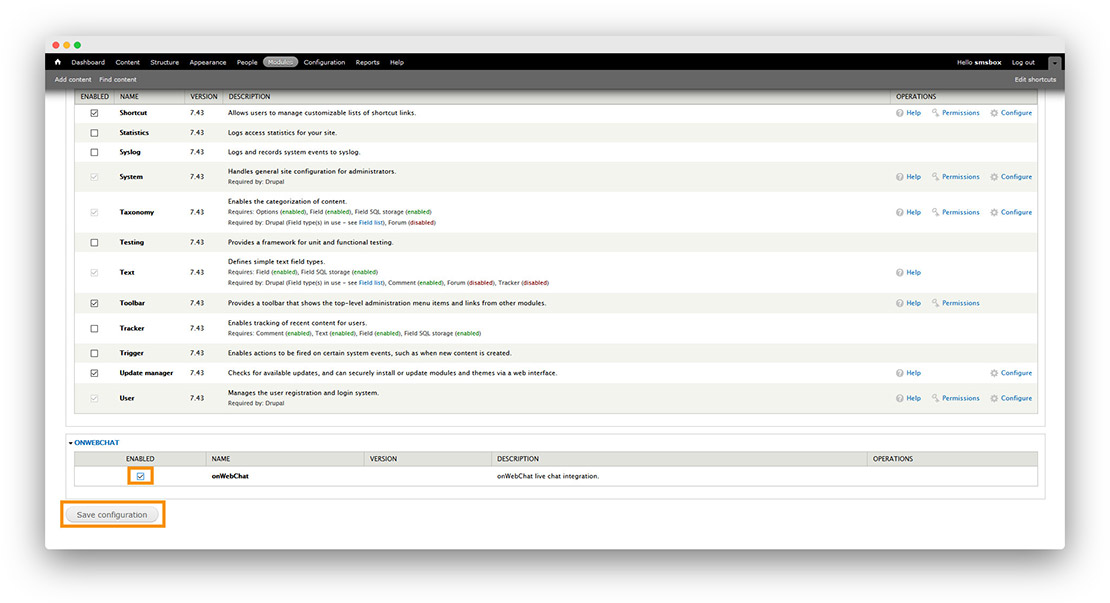
Step 3 Search for onWebChat, check the Enable checkbox, then click Save Configuration.
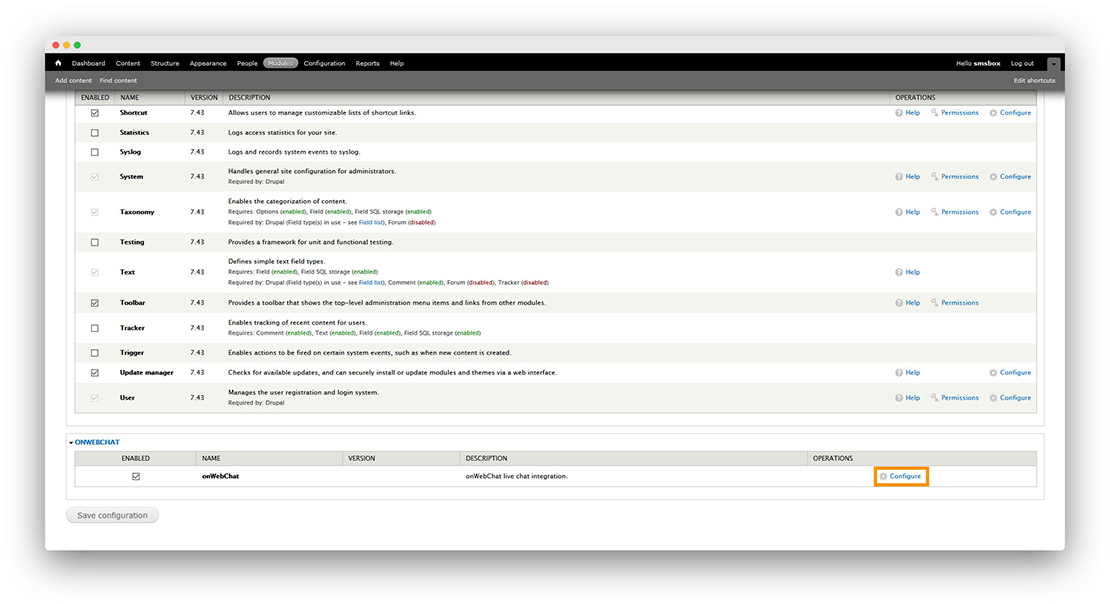
Step 4 Once the module is installed, click Configure.
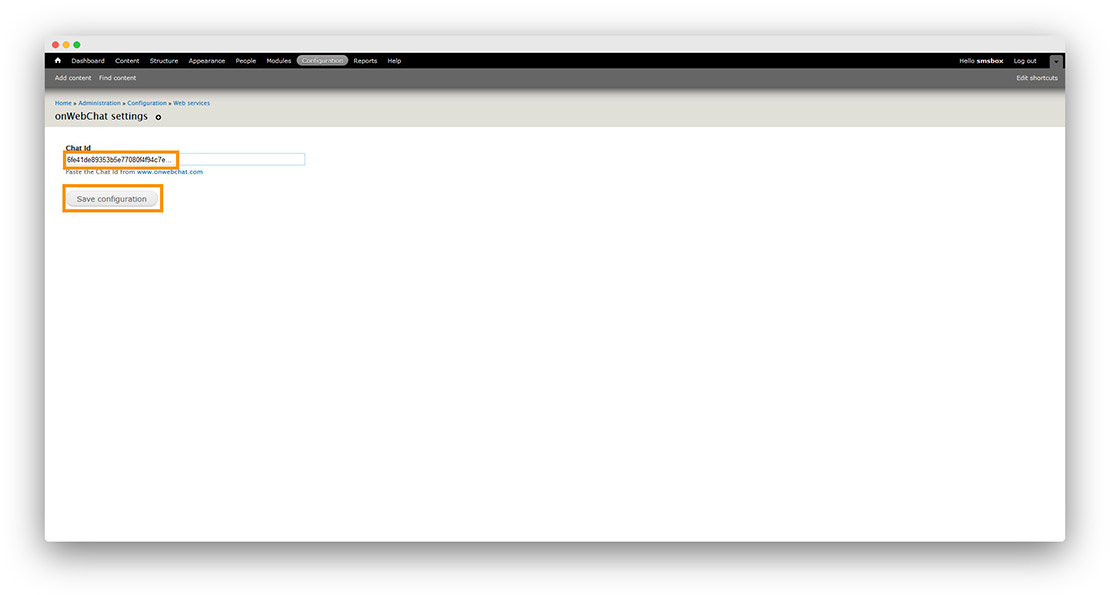
Step 5 Enter your Chat ID and click Save Configuration.
Don't have a Chat ID yet? Create a free onWebChat account.
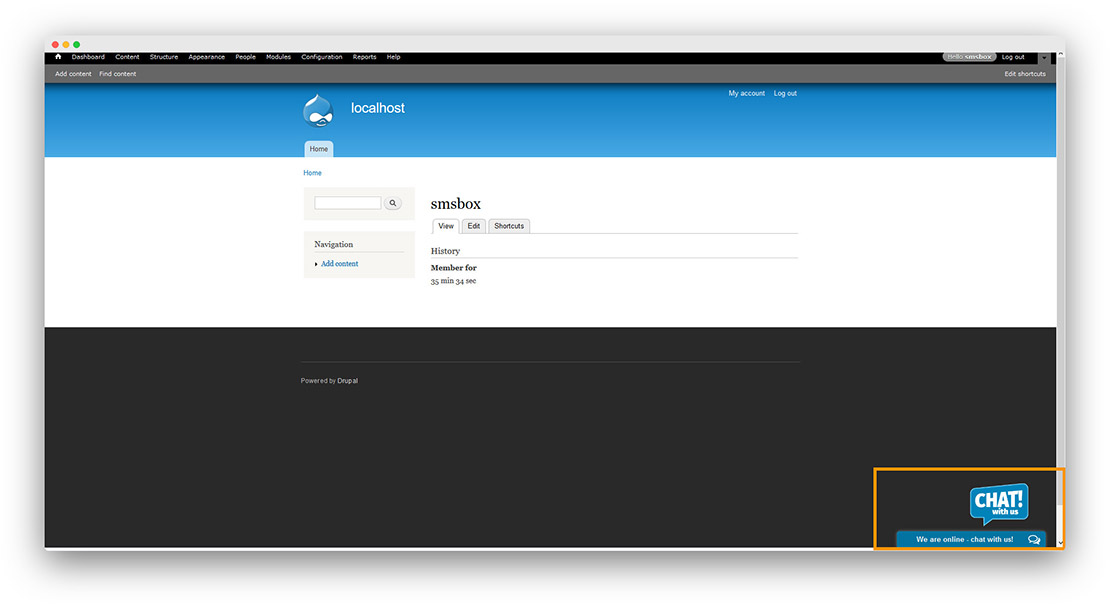
Done! Your live chat widget is now live on your Drupal site.