Step 1
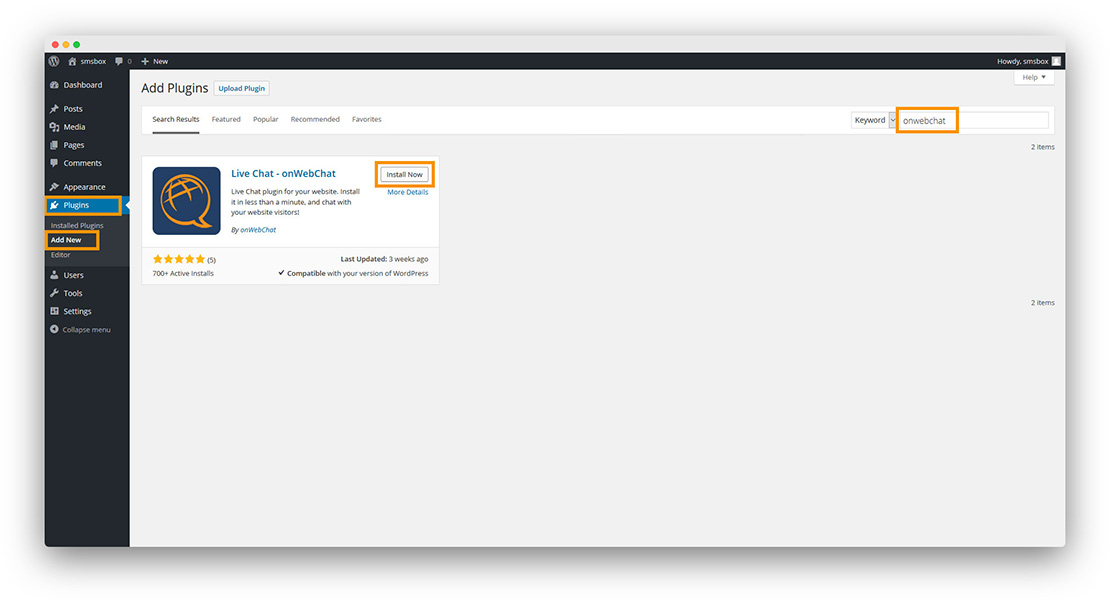
Go to Plugins Add New. Search for onWebChat, then install the plugin.
After installation, click Activate to enable the plugin.
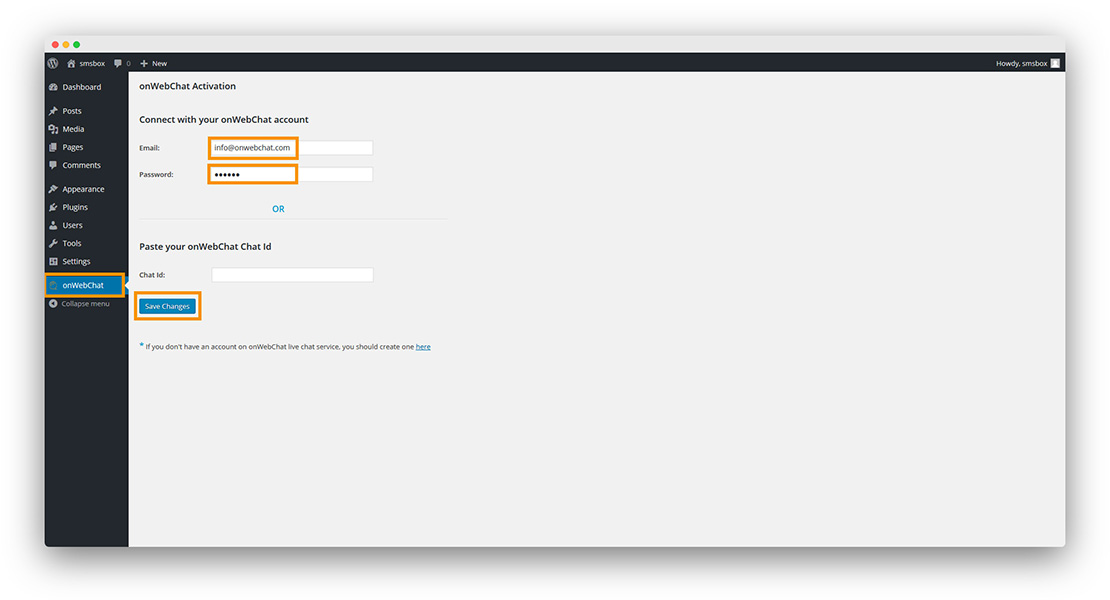
Step 2 Open the onWebChat plugin settings and enter your onWebChat credentials (email and password). Alternatively, you can connect using your Chat ID, then click Save Changes.
If you don't have an onWebChat Chat ID, please create an account here.
If you cannot connect using your email and password, use your Chat ID instead. You can find it in your dashboard or in your registration email.
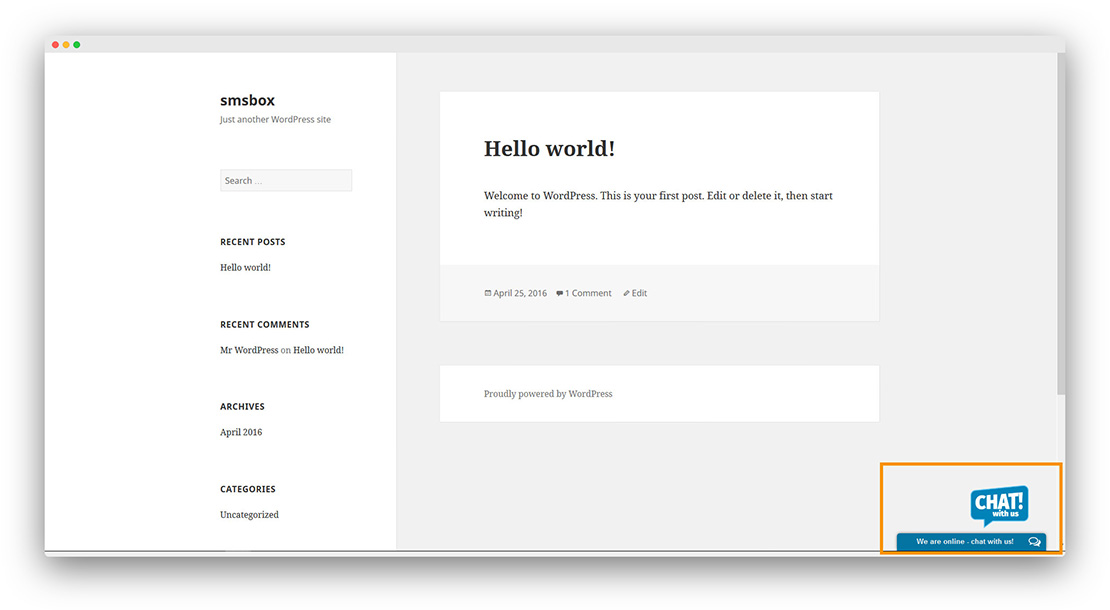
Congratulations! Your live chat widget is now active on your website.
If the widget does not appear, try clearing your website cache or purging your caching plugin.
Like onWebChat?
If you're enjoying the plugin, we'd really appreciate a positive review on WordPress.org. It helps us grow and continue improving the product.