Step 1 Copy all the required files to the following directories:
admin/controller/module/onwebchat.php → "opencart folder"/admin/controller/module
admin/language/english/module/onwebchat.php → "opencart folder"/admin/language/"language you are using"/module/
admin/view/template/module/onwebchat.tpl → "opencart folder"/admin/view/template/module/
catalog/controller/module/onwebchat.php → "opencart folder"/catalog/controller/module/
catalog/view/theme/default/template/module/onwebchat.tpl → "opencart folder"/catalog/view/theme/"theme you are using"/template/module/
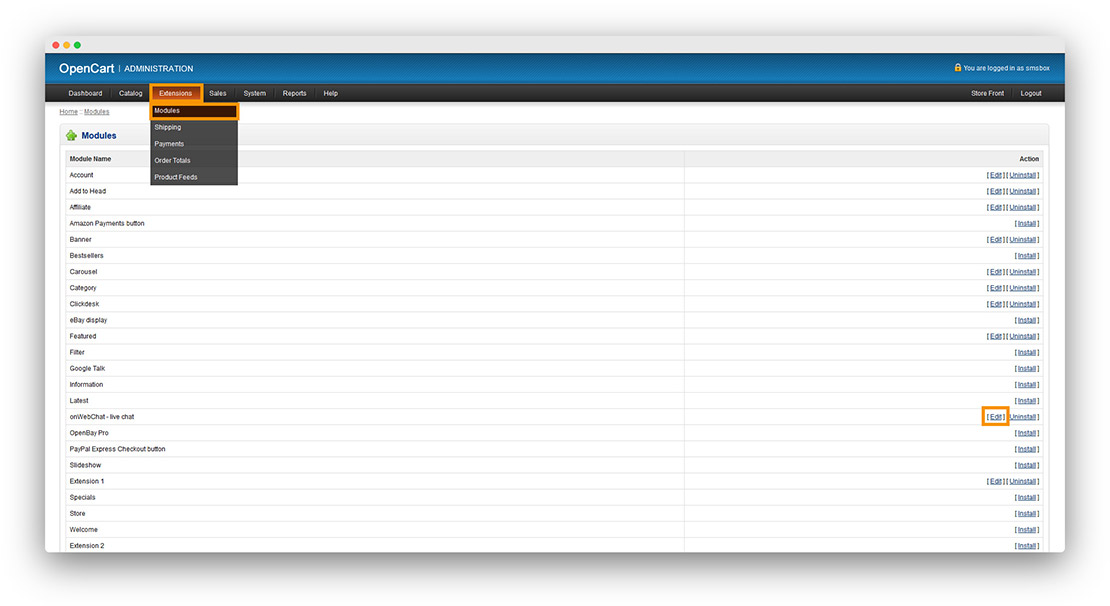
Step 2 From the OpenCart admin panel, go to Extensions → Modules. Find onWebChat - Live Chat and click Install. Click Edit to configure the module.
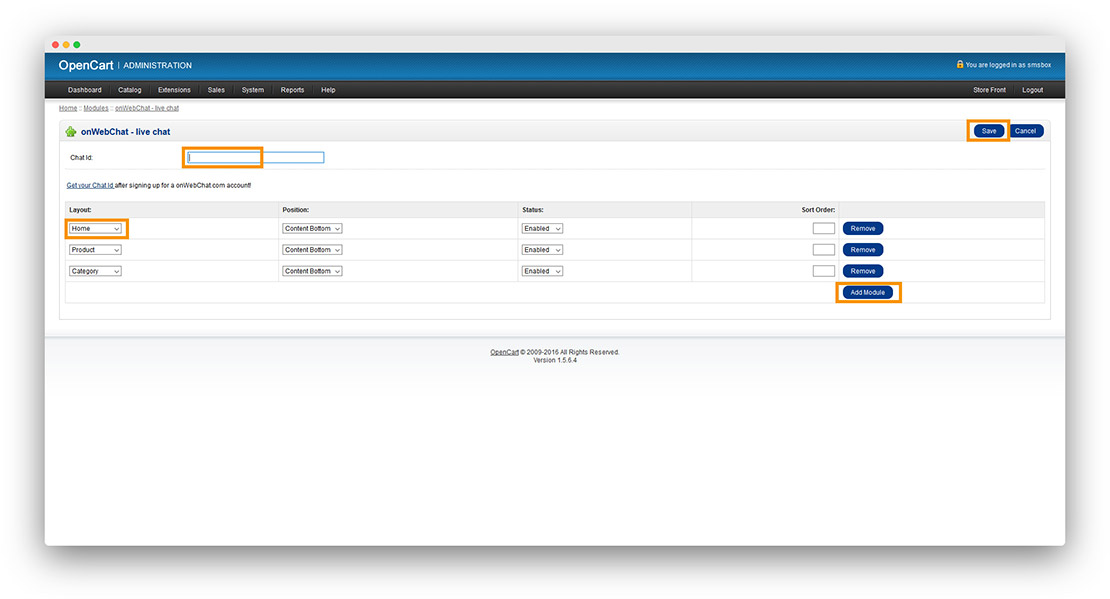
Step 3 Enter your Chat ID. Click Add Module to add onWebChat to the layouts you prefer (Home, categories, products, etc.). Save your settings.
Don't have a Chat ID yet? Create a free onWebChat account.
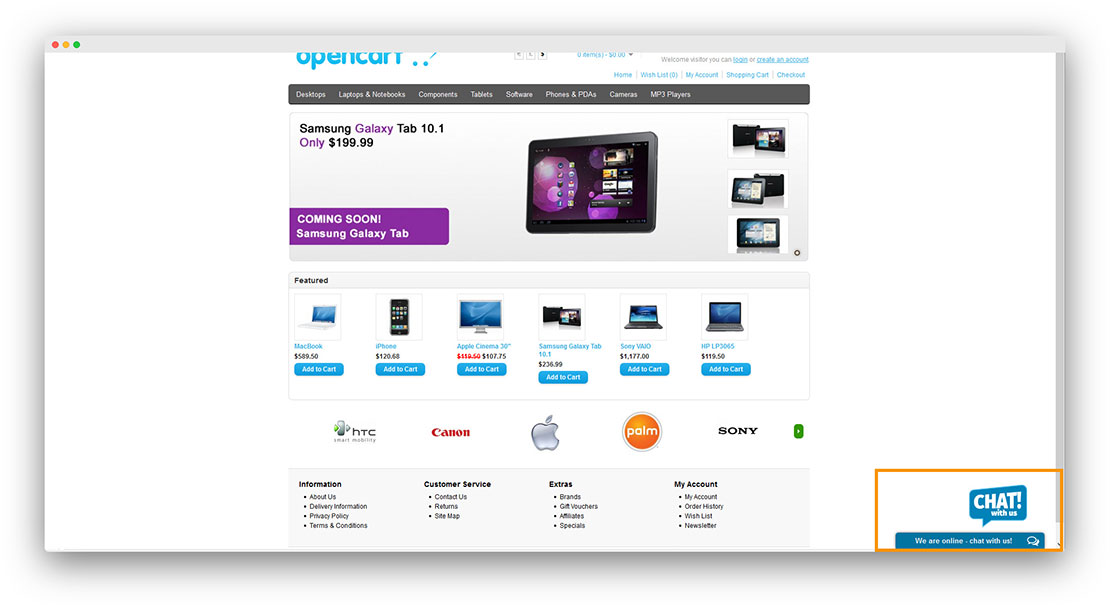
Done! Your live chat widget is now live on your OpenCart store.
Like onWebChat?
If you're enjoying this extension, we'd really appreciate a positive review on opencart.com. It helps us grow and continue improving the product.