Dashboard
When you log in, you'll see the Overview page. It highlights key metrics and summarizes your live chat activity.
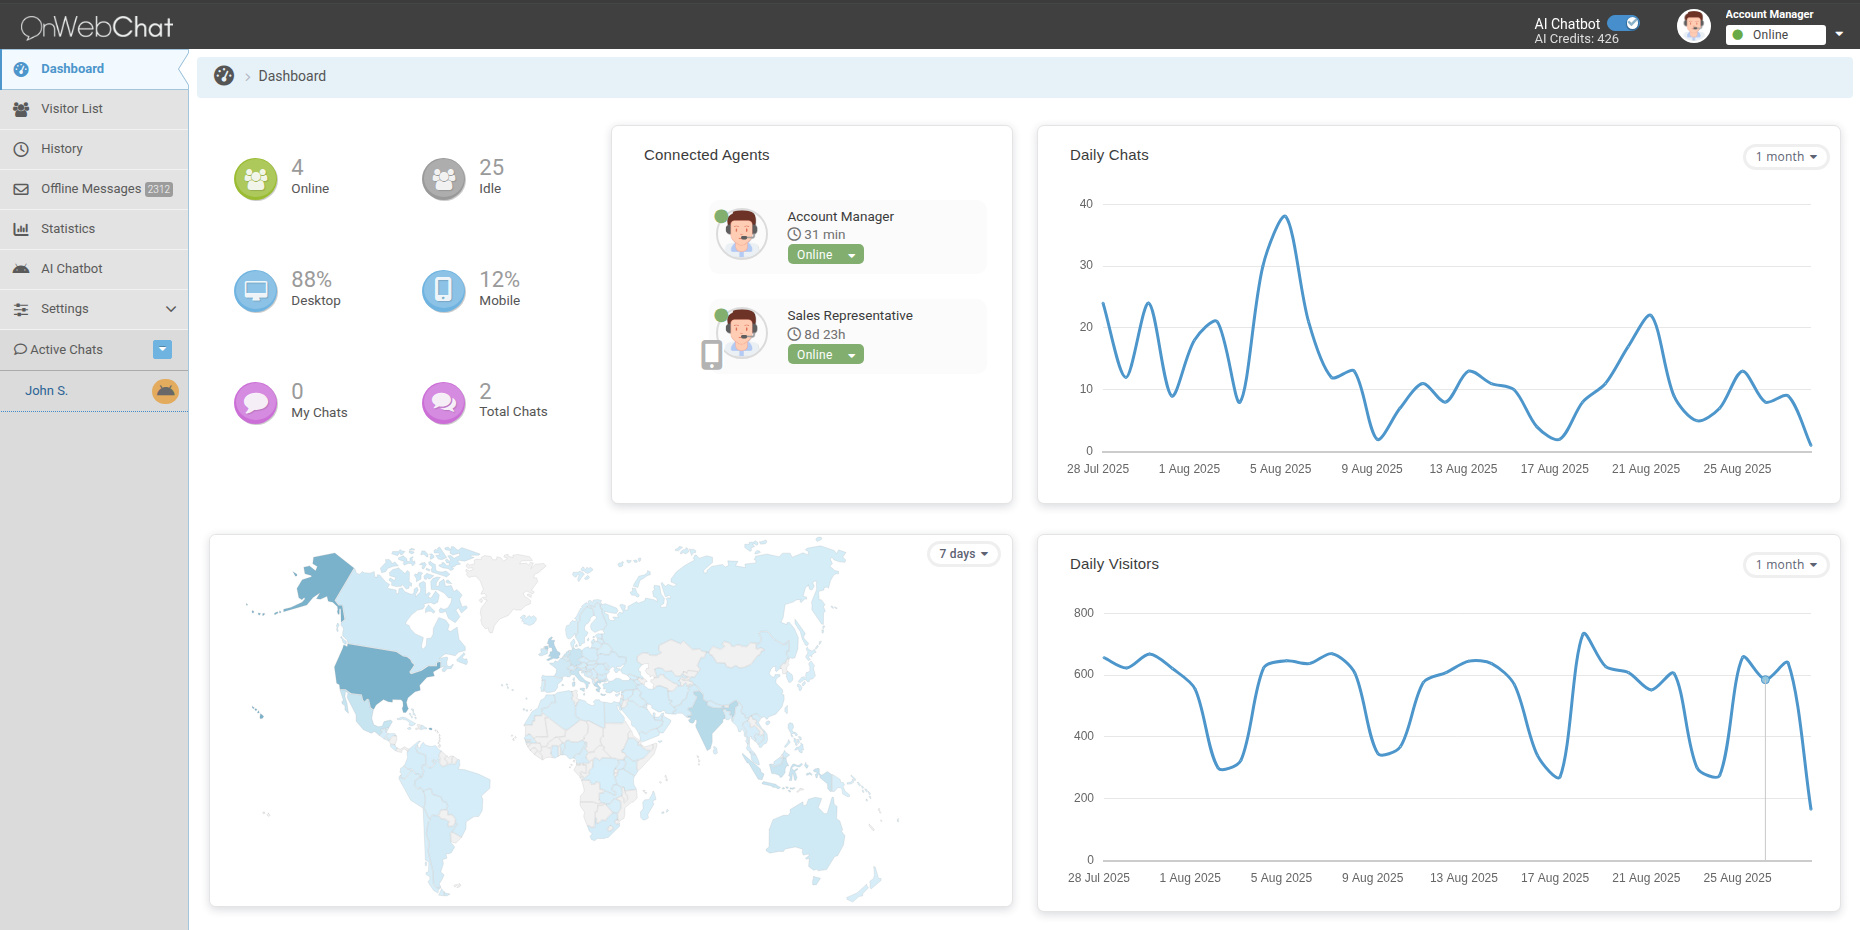
In the top-left corner, you can quickly check daily and real-time stats: visitor count, device types, and today's conversations. You can also see which agents are currently online.
The right side features two helpful charts tracking your daily conversations and visitors.
Chat Page
This is where you talk to your visitors. Open it by answering an incoming chat on the left, or by starting one directly from the Visitors page.
The chat window is the main focus here. Just type your messages in the input area at the bottom.
On the right, you'll find visitor details collected automatically: country, OS, browser, visited pages, and full chat history. You can also leave private notes for future reference.
Visitors Page
Here you can monitor everyone currently browsing your website.
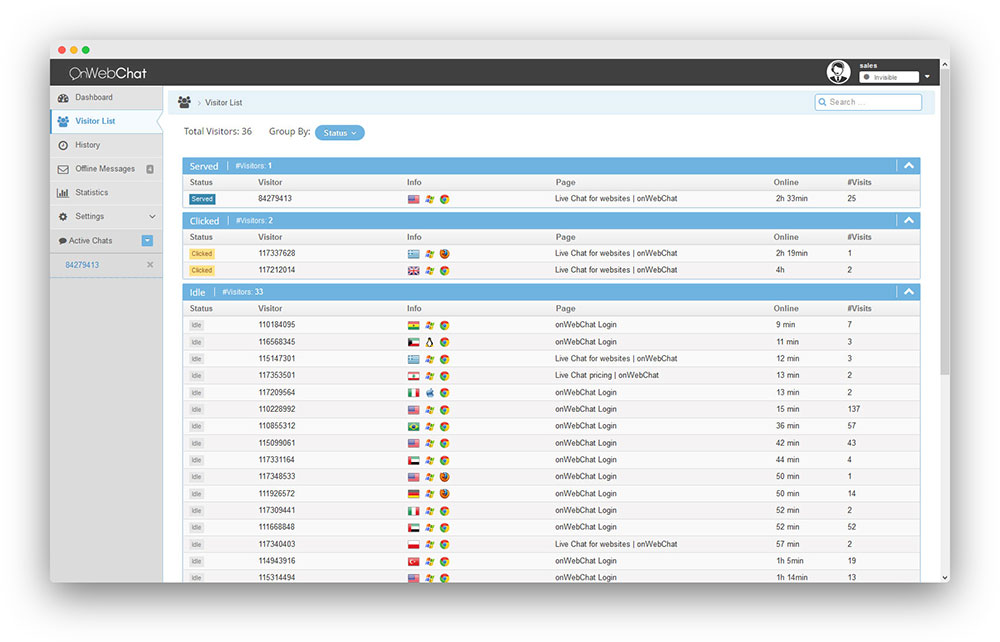
Click on any visitor to start a chat. Use the filters and search bar to find people based on the page they're viewing, their location, or status.
Visitors History
Review past visitors and their complete journey: pages viewed, time spent, and more. We keep this data for 60 days to help you understand how people interact with your site.
History Page
This page archives all your past conversations.
Click any chat to read the full transcript. Use the search tool in the top-right to find specific chats by agent, visitor name, or message content.
Offline Messages
Messages left while you were offline appear here, with the newest at the top. Click any row to read the full message on the right.
If the "send email" button doesn't work in your browser, simply copy the visitor's email and reply from your own email client.
Statistics Page
Track performance for your team and website. Select a date range to view metrics like total chats handled and average duration per agent.
Settings

Installation — Find your Chat ID for plugins or grab the full code for manual setup.
Widget — Customize your chat widget's appearance: colors, text, offline forms, and more.
Agents — Add or edit team members. Administrators can manage all settings, while Agents have standard access.
Shortcuts — Save reusable messages (like greetings). Type a few letters during a chat to quickly insert them.
Sounds & Notifications — Set up audio alerts and desktop notifications for new messages and visitors.
Operating Hours — Set your availability for agents and AI chatbots. Create a flexible weekly schedule so customers know when you're online.
Blocked Visitors — Manage blocked users. You can block disruptive visitors directly from the chat page.
Triggers — Set up automated messages. For example, proactively engage visitors who spend more than 20 seconds on your pricing page.
Departments — Organize your team into departments (e.g., Sales, Support) so visitors can reach the right person.
Security — Restrict your chat widget so it only loads on authorized websites.